
How to Tan Evenly Without Streaks: A Professional Routine
The short version
Getting an even tan without streaks comes down to three things: smooth skin before you apply, light hands during the pass, and extra blending wherever the skin runs drier. When those three stay consistent, color develops as a soft gradient. When one of them slips, you get a line.
Most streaks are not random. They show up because one patch of skin is rougher than the area next to it, because too much product lands in a single pass, or because hand pressure shifts as you move from large flat zones like the thighs and torso into tighter spots like the wrists, ankles, and knees. The answer is never more product. A repeatable routine that keeps each section balanced, lets you check the finish before moving on, and treats dry areas as places to diffuse color rather than saturate them is what actually changes the result.
What causes self tanner to streak
Self tanners develop color through a chemical compound called dihydroxyacetone (DHA) rather than a dye or pigment. DHA reacts with the surface of the skin to create color, which means any variation in that surface (texture, hydration level, or product amount) changes how deep the color develops in a given spot. That is the core reason streaks form.
Self tanner streaks appear when product load, skin texture, or hand pressure varies between body sections during a single application. A drier patch holds more formula. A heavier mitt pass leaves a denser track. Any unfinished edge becomes visible once the color develops. Knowing which of those caused the mark is the fastest way to fix it and to keep it from repeating.
Uneven skin texture grabs more product
Rough or flaky skin catches self tanner before it spreads across smoother skin nearby. Lower legs, outer arms, and any area with leftover dryness can come out speckled or darker in small clusters instead of uniformly bronzed. The finish often reads as patchiness even when your color choice was right. Smooth the texture first, and use lighter, longer passes on any area that feels less even under your hand.
Dry zones develop darker lines faster
Elbows, knees, ankles, hands, feet, and wrists absorb color more aggressively because the surface is drier and more compact. A normal amount of product on those zones can look like too much once development kicks in, leaving rings around joints or hard edges near the wrist and ankle. What looks subtle during application can deepen into obvious contrast by the time you rinse. Keep fresh product minimal on those zones and pull leftover color outward from the surrounding area.
Too much product creates overlap marks
Heavy first-pass application sits on the skin in thicker bands, especially when you dispense more mousse or lotion than one section can absorb evenly. A second pass over that area makes the overlap line visible because one strip now has double the pigment of the next. Common spots are calves, forearms, and the sides of the torso where angles change quickly. Build coverage with thin layers and add only where the surface still looks lighter, not where it already looks wet.
Rushing leaves unblended edges
Fast application breaks down at transition points, not across large flat areas. You might cover the shin well and then leave a harder edge at the ankle, or finish the forearm and forget to feather into the wrist. Unfinished edges read as streaks because abrupt depth changes catch the eye before overall color does. Treat every section as incomplete until you have checked and softened both borders.
Set up a consistent routine before you apply anything
A smoother result starts before the mitt goes on. Four variables worth locking in every session so the finish feels predictable rather than like a coin flip.
Start with smooth, clean skin
Remove residue from earlier products and make sure the skin surface feels even rather than slick, dusty, or rough to the touch. A light body polish helps the formula spread rather than catch in scattered spots, especially on lower legs and upper arms. If one area still feels rough when you run your hand over it, refine that zone before adding any color. A dedicated exfoliator for self tanning makes this step faster and more consistent session to session.
Keep hydration targeted, not all-over
Use a small amount of lightweight moisturizer only where the skin naturally runs drier: elbows, knees, ankles, wrists, knuckles, and the tops of feet. Coating the whole body often makes the product slide and develop too lightly in broad sections. A thin layer on the grab-prone zones softens them so they take color closer to the rate of the surrounding skin. If the surface looks shiny or slippery, you used too much, so wait until it settles or blot it down.
Pick one applicator and use it every time
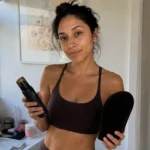
Consistency improves when you use the same main tool because your pressure, spread, and product pickup become predictable. A tanning mitt covers larger areas most evenly, while a small blending brush handles hands, feet, and the hairline without depositing extra formula. Pick one before you start and keep the second tool for detail work only.
Decide your body order before you start
Any sequence works as long as you follow it the same way each time. Decide where to start, which sections to group together, and where to switch to lighter pressure before you pick up the product. Improvising with half-developed product on the skin is where sequences fall apart. A simple order like legs, torso, arms, then detail zones works well enough that it is worth repeating until the results are consistent. For a full breakdown of what each prep step does, see how to prepare skin for self tanning.
How to apply self tanner evenly, section by section
You build evenness here. Keep every section thin, connected, and checked before the product has a chance to settle into edges or dry patches.
Work one zone at a time
Apply to one defined zone at a time: one lower leg, one upper leg, the front of the torso, the back of the torso, one arm. Place product on the mitt, spread it across the zone with light circular motions to distribute, then use longer sweeps to even out direction and pressure. Keeping the area small lets you see where coverage is still sheer and where it is already complete, which is much harder to judge if you jump between zones.
Before moving on, soften the edge where that section meets the next one. On the leg, feather around the ankle and up toward the knee rather than stopping in a visible band. On the arm, fade color into the wrist and shoulder line. Streaks often come from section borders, not from the center of the section.
Build coverage with light passes, not a heavy first layer
A thin first layer gives you room to correct. Press the mitt lightly enough that the formula spreads instead of being stamped on, and aim for an even veil rather than instant depth. With an express mousse, the guide color can trick you into thinking more is needed before it actually is. A gradual tanner is more forgiving, but the principle holds: measured passes make the final tone smoother.
Step back and assess the section under consistent lighting before adding anything. If one side reads lighter, add a small amount only there and blend outward into what is already on the skin. Layering gradually produces cleaner color than a single heavy pass because there are fewer wet overlaps competing to develop at different depths.
Use a lighter touch on hands, feet, elbows, knees, and ankles
Detail zones need a different approach from larger areas. Once the nearby section is finished, use what is left on the mitt or switch to a small brush and work with almost no added product. Sweep from the forearm into the wrist and lightly over the back of the hand, keeping the knuckles diffused rather than coated. Do the same from shin to ankle and from calf to the top of the foot.
Elbows and knees blend better when slightly bent, which smooths the creases and helps a whisper-thin layer sit evenly across the surface. Ankles tend to streak when product gathers around the bones, so side-to-side feathering works better there than short concentrated circles. For the hairline, a brush with very little residue keeps the face-to-body transition clean.
A polished torso and legs can still read uneven if the hands are too deep or the ankles carry sharp lines. Detail work matters more than it looks like it should.
Check each section before you move to the next
Pause after each zone and inspect it in consistent lighting while the guide color is still easy to read. Look for hard edges at the border, darker tracks where the mitt overlapped, pale gaps near curves, and excess depth on dry points. Not looking for perfection, just checking whether the finish is balanced enough that development will stay even.
Catch a problem now and it takes seconds to fix with the same tool. A clean side of the mitt can soften a line; a small brush can diffuse extra color around wrists or ankles without spreading the issue. Set-in contrast takes far more effort to rebalance later.
How to fix streaks and uneven spots before they set
Not every streak means starting over. Most can be reduced with a small correction if you act while the product is still workable. If the tan has already set or the unevenness is more widespread, the streaky self tan fix guide covers what to do at each stage: fresh, developing, and fully set. For patchiness that goes beyond a single line, how to fix patchy self tan walks through the full correction sequence.
If one area looks darker than the rest
A darker patch usually means too much formula landed in one pass, or a second pass overlapped before the first was fully distributed. Take a clean mitt or the clean edge of your current mitt and buff outward from the darkest point into the surrounding skin until the border softens. If the edge still shows, use a tiny amount of leftover product on the mitt to merge it rather than adding fresh product directly to the patch. Prevention: measure product by section and pause after the first pass before deciding it needs more.
If you see lines at the wrists or ankles
Lines at the wrist or ankle happen when product stops instead of fades because the forearm or leg was finished but the hand or foot transition was skipped. Use a brush or barely loaded mitt to feather in both directions, pulling color away from the band until it looks like a gradient. Light pressure diffuses the edge; heavy pressure builds a new one. Prevention: treat wrists and ankles as transition zones every session, not endpoints.
If your hands or feet look overdone
Hands and feet deepen fast because they are compact, dry, and easy to overwork. If the tops look too strong, buff with a clean brush in broad strokes from the center outward, then blend a trace of remaining product up the arm or down the leg so the contrast looks intentional rather than abrupt. Skip the fingers, knuckles, toes, and side bones. Prevention: finish these areas last using residue only, then check from a distance.
If a patch dries before you blend it
A fast-drying patch shows as a small deeper island with a sharper outline than the area around it. Product sat while you changed position, reached for more, or switched tools. Rework the perimeter first with a clean mitt or brush, then lightly tap and sweep across the center only if the border still stands out. Prevention: keep your product, mitt, and detail brush within reach so each section can be finished without interruption.
Habits that make every session more consistent
If results vary from session to session, the missing piece is usually routine stability. Keeping your prep window, lighting, and product amount consistent trains your eye to recognize what balanced coverage looks like. Change all of them at once and it becomes hard to tell whether a section needs more or just looks lighter because of the angle.
When a certain area repeatedly develops darker, adjust the condition driving it rather than skipping that zone or scrubbing harder next time. If elbows and knees always go first, use less product and keep hydration lighter but more targeted there. If calves show overlap marks, reduce the amount on the mitt and lengthen each pass. If wrists or ankles keep forming bands, spend five extra seconds fading the border before moving on. Small adjustments in pressure and distribution change the result more than switching products does.
Use the same mitt each time, keep a small brush nearby for hands, feet, and the hairline, and skip the urge to chase instant depth on the first pass. A controlled routine feels slower for the first few sessions, but it becomes the fastest path to a clean finish because there is less correcting to do. Lay out the mitt, brush, and product before you start, commit to the same measured amount per section for three sessions in a row, and see what changes.
How to Get Rid of Tan Lines: The Fix That Actually Works Overnight
That’s What Sea Said Tanning Lotion Review: What It Does After Multiple Bed Sessions
Best Shimmer Body Oils: Picks by How You Use Them
Self-Tanning: The Complete Guide
Best Shimmer Body Sprays for a Bronzed Glow
My 10-minute self-tan routine saves me at least 30 minutes every week.