
Streaky Self Tan Fix: How to Read the Streak and Correct It Fast
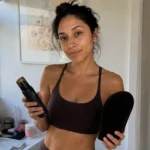

What kind of streaking are you actually looking at?
A streaky self tan fix works best when you identify what went wrong before you try to correct it. Fresh guide-color drag marks need a different move than a dark grabby band on the elbow, which needs a different move than a pale missed strip on the outer arm. If you reach for the wrong tool at the wrong stage, you usually spread the pigment, deepen a dry patch, or end up with a second layer that looks heavier than the original streak. I have done all three. Timing and type are the two things that determine which approach actually works.
Self tanner streaks form when product load, skin texture, or hand pressure varies between body sections during a single application session. A drier patch holds more formula and develops at higher intensity. A heavier mitt pass leaves a denser track. Any unfinished edge becomes a visible line once dihydroxyacetone (DHA), the active compound in self tanner, locks into the skin surface. Knowing which of those caused your streak is what determines whether you blend, reduce, reapply, or wait, and in what order.
Fresh guide-color drag marks
These show up right away: darker swipe lines, finger-width trails, or a visible edge where the mitt changed direction. The product is still sitting on the surface, not yet locked in. A mitt passed with too much pressure, too much leftover foam, or one extra pass causes these, and they are usually the easiest to correct because the tan has not set yet.
Dark grabby bands on dry areas
Dark grabby bands show up on elbows, knees, ankles, wrists, and knuckles, sometimes along the sides of the feet. It can look like a darker ring, a smudged band, or a patch that absorbed far more color than the surrounding skin. Usually becomes clearer as the tan develops or after the first rinse. The surface was drier and more compact, so it pulled in more formula. The problem is excess color in a specific zone, not a missing coat everywhere else.
Light gaps where product barely landed
Pale strips, skipped areas, a shape that looks like the mitt glided over without depositing much. Common spots are the outer arms, the back of the calf, the inner wrist, and curved sections where the hand changes angle mid-application. They often become obvious once the surrounding color deepens during development and the missed section stays noticeably lighter.
Patchy fade that looks like streaking
Not every uneven result comes from the original application. Sometimes the tan looked smooth on day one and then started breaking apart into bands or flakes two to four days later. At a glance it reads like streaking, but the timeline is different. Friction, dry patches, or repeated washing make the fade look striped. Adding fresh self tanner over patchy fade often creates muddy contrast instead of a cleaner finish, so the approach here differs from fixing a fresh mistake.
| What it looks like | Most likely cause | Best correction move |
|---|---|---|
| Dark straight lines or swipe marks | Too much product in one mitt pass or extra pressure during blending | While fresh, feather with a clean mitt. If already set, use a self-tan remover or damp exfoliating mitt on the line only, then soften edges. |
| Pale strips or obvious missed sections | Low product load, poor angle, or incomplete contact with the skin | Add a very small amount of tanner to the pale area only, blending from surrounding color inward. A gradual self tanner works well here since it deposits softer color. |
| Blotchy knees, elbows, or knuckles | Dry texture grabbing excess color | Buff down the darkest buildup first, then use a tiny amount of body moisturizer to soften the edge before any light reapplication. |
| Hands and wrist buildup | Leftover product transferred at the end of application | Use a damp cloth or remover on the crease lines and around the wrist bone, then blend downward with a clean mitt to reconnect the color. |
| Patchy ankles or feet | Dry skin, product pooling, or overlap from leg application | Reduce depth with an exfoliating mitt or remover. Rebalance with a light pass using leftover mitt residue rather than a full pump. |
| Patchy fade resembling streaks | Uneven wear, friction, and old color clinging in spots | Do not spot-layer immediately. Loosen old color first, smooth the surface, then reapply evenly over the whole area. |
Fix it while the tan is still fresh
Fresh-tan corrections have a window of about 30 to 60 minutes while the product still has slip. The most common mistake in that window is adding more product. When a fresh tan looks streaky, more tanner usually makes it worse. Stop, step into brighter light, and figure out whether you are seeing dark excess, a pale miss, or a dragged edge before touching anything.
If the product still has slip, use a clean blending mitt or the least-loaded side of your current mitt to feather the streak edge into the surrounding area. Short, light passes outward from the darkest line. Heavy pressure pushes more color into the skin and widens the problem rather than fixing it.
For a mark that is clearly too dark, lift before you add. A barely damp washcloth, a soft towel corner, or a dampened blending mitt can reduce surface excess while the tan is still fresh. Blot or glide once, reassess, then stop. Repeated rubbing creates a pale patch that can look sharper than the original line, especially on the legs.
For a pale missed section, use the smallest amount of product possible. Tap most of it into a nearby area or onto the mitt itself before touching the light spot, then blend from the outside inward so the correction melts into existing color rather than forming a new edge. A gradual tanner like Jergens Natural Glow is particularly forgiving in this situation because it deposits softer color and makes correction passes harder to overdo.
Once the fix is done, leave the area alone. Loose clothing, a dry environment, and minimal contact protect a correction better than another coat does. Sweat, creased fabric, or sitting cross-legged while color is still shifting can undo a section you just blended out. In my experience, the hardest part of fixing a fresh streak is stopping yourself from going back in too soon.
Why self tanner turns streaky in the first place
Surface texture changes how color grabs
Color develops unevenly because the surface is uneven. A drier patch holds onto more product, triggers deeper development in that spot, while smoother surrounding skin develops at a lower intensity. Elbows and ankles can end up several shades darker even when you used the same amount everywhere because the surface changed the pickup rate, not the product itself. Dark buildup on dry zones needs reducing or buffering, not another all-over layer.
Application pressure creates uneven product tracks
Mitt pressure shifts as your hand moves, leaving heavier deposits in one pass and thinner ones in the next. Curves make it worse: your wrist bends around a calf, your grip tightens, and the mitt leaves a denser track on one side of the stroke. Product load compounds the effect. A saturated mitt starts with a richer swipe and gradually drops off, so many streaks are simply the footprint of inconsistent pressure and inconsistent distribution rather than any problem with the formula.
Contact and movement shift development after application
A tan can start evenly and still finish uneven because the development phase gets interrupted. A bra strap rubs, the backs of the knees crease, sweat collects under a sleeve, or you sit before the surface settles. Movement shifts product away from one area and into another, creating a pale break or a darker seam. Overcorrecting here usually makes it worse: every time you touch a developing tan, you are moving color rather than just adding it.
Build a more even routine to prevent streaks next time
Prep dry zones selectively, not all over
Coating your whole body in moisturizer before tanning can make product slide unpredictably and develop too lightly in broad sections. A better move is targeted buffering: a light layer of body moisturizer on elbows, knees, ankles, feet, hands, and any rough spots that consistently go darker than the rest. Closing the gap between grabby texture and smoother skin is what reduces the visible contrast, and the improvement is usually most obvious around joints and along the lower legs. If a spot tends to hold old tan, an exfoliating mitt or self-tan remover the day before helps reset it so you are not applying over leftover buildup.
Apply in zones with clear stopping points
Work in defined zones (lower leg, upper leg, stomach, chest, one arm, then the other) rather than moving around the body at random. Clear stopping points reduce accidental overlap because you know where one section ends and the next begins. Use roughly the same amount of product for similarly sized areas, and distribute it across the mitt before touching the skin.
Hands, feet, wrists, and ankles deserve a deliberate slowdown. Use residue from the mitt rather than a fresh pump in those zones, then connect them back to the body with soft downward strokes. Stopping that single extra deposit at the end of each section usually cuts buildup in the detail zones more than any other change. For a full breakdown of how to set up the entire application sequence, see how to tan evenly without streaks.
What to remember the next time it happens
Most streaks are fixable. The ones that are not are the ones that get overcorrected, layered on, or worked over too many times before the tan has a chance to settle. Read the type first, use the smallest correction possible, and give it time before deciding it still needs more.
If the problem comes back in the same spots every session, the streak is telling you something specific about your routine: a zone that needs lighter prep, a section border you are not feathering, or a detail area that is getting too much product at the end. One small adjustment per session gets you further than switching formulas.
How to Get Rid of Tan Lines: The Fix That Actually Works Overnight
That’s What Sea Said Tanning Lotion Review: What It Does After Multiple Bed Sessions
Best Shimmer Body Oils: Picks by How You Use Them
Self-Tanning: The Complete Guide
Best Shimmer Body Sprays for a Bronzed Glow
My 10-minute self-tan routine saves me at least 30 minutes every week.